Okay, let’s talk about smartphone astrophotography. It’s this crazy cool thing where you can actually capture the night sky using just your phone! I know, I know, it sounds too good to be true, but trust me, I’ve been there and done that.

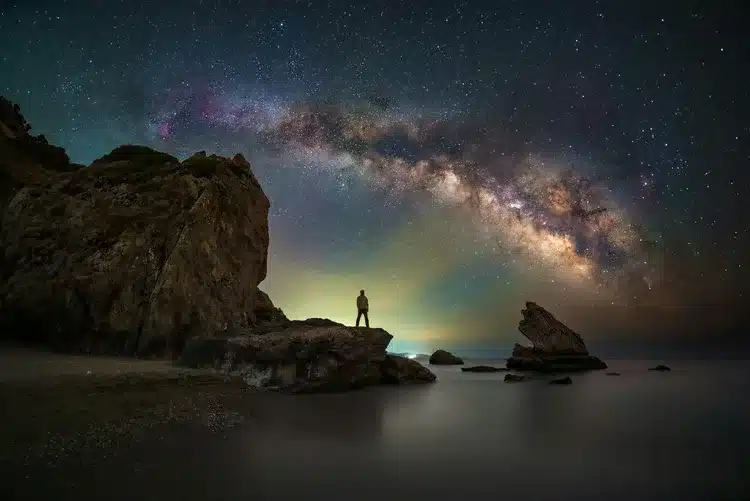
When I first heard about it, I was like, “No way! You need some fancy DSLR camera to take pictures of stars, right?” Wrong! I was so pumped when I discovered I could snap shots of the Milky Way with the same device I use to scroll through memes. It’s pretty wild how far phone cameras have come!
So, why is everyone and their grandma getting into this? Well, for starters, it’s super accessible. You don’t need to shell out thousands of bucks for equipment. Plus, it’s just plain fun! There’s something magical about pointing your phone at the sky and capturing the cosmos.
In this guide, I’m gonna spill all the tea on smartphone astrophotography. We’ll cover everything from the gear you need (spoiler: it’s not much) to the best apps and techniques. By the time we’re done, you’ll be ready to head out and shoot the stars like a pro. Well, maybe not a pro, but definitely better than your friends!
Table of Contents
Essential Equipment for Smartphone Astrophotography
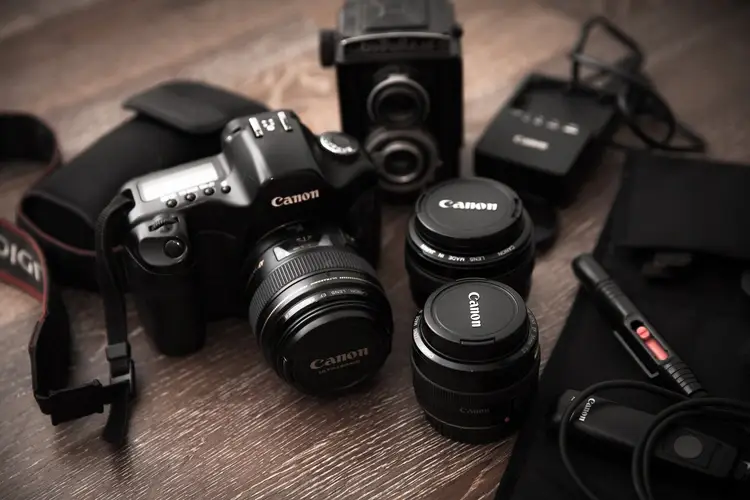
Alright, let’s talk about gear! Now, before you start panicking about needing to buy a bunch of expensive stuff, take a deep breath. The beauty of smartphone astrophotography is that you don’t need to mortgage your house to get started. Trust me, I learned this the hard way after blowing way too much cash on gadgets I didn’t really need.
First things first, your smartphone. Now, I’m not gonna lie, some phones are better than others for this kind of thing. But here’s the good news: most modern smartphones can do a decent job. Look for one with a “night mode” or the ability to shoot in RAW.

Next up, you’re gonna want a tripod. I know, I know, it sounds boring, but trust me on this one. Trying to hold your phone steady for a long exposure is like trying to eat soup with a fork – frustrating and ultimately pointless. I learned this lesson after a night of blurry star trails that looked more like squiggly lines. Any cheap tripod will do, but make sure you get a phone mount to go with it.
Now, here’s where things get a bit fancier – clip-on lenses. These little beauties can seriously up your game. Wide-angle lenses are great for capturing more of the night sky, while telephoto lenses can help you zoom in on the moon.

Lastly, consider getting a remote shutter release. It’s not essential, but it can help reduce camera shake when you’re taking a photo. Plus, it makes you feel like a real photographer! I use a Bluetooth remote that I picked up for cheap online, and it’s been a game-changer.
Remember, you don’t need all this stuff to get started. Heck, you can take some pretty sweet shots with just your phone and a steady hand. But if you’re looking to level up your smartphone astrophotography game, these gadgets can really help. Now, let’s move on to the fun part – the apps!
Best Apps for Smartphone Astrophotography
Okay, folks, it’s time to talk about apps! And no, I don’t mean Angry Birds or Candy Crush (though those are great for killing time while you’re waiting for the stars to come out). I’m talking about the apps that’ll turn your smartphone into a lean, mean, star-photographing machine!
First up, camera apps. Now, your phone’s built-in camera app might be fine for selfies, but for astrophotography, you’re gonna want something with a bit more oomph. Look for apps that give you manual control over things like ISO, shutter speed, and focus. My personal fave is ProCam – it’s like having a DSLR in your pocket! The first time I used it to take a 30-second exposure of the stars I felt like a kid on Christmas morning when I saw the result!

Next, you’re gonna want some star chart apps. These babies are like GPS for the night sky. They’ll tell you what constellations are visible, where to find planets, and even when the International Space Station is flying overhead. I use Star Walk 2, and let me tell you, it’s saved my bacon more than once when I’ve been out in the field trying to figure out what the heck I’m looking at.
Now, let’s talk about photo editing apps. Because let’s face it, even the best raw photo of the night sky can use a little zhuzhing up. Snapseed is my go-to for this. It’s got all sorts of nifty features for bringing out the best in your astro shots.
Last but not least, stacking apps. These are for the real nerds among us (and I say that with love, being a proud nerd myself). Basically, they let you combine multiple shots of the same subject to reduce noise and bring out more detail. Deep Sky Camera is a good one for this. Fair warning though, it can be a bit of a learning curve. But trust me, it’s worth it!
Remember, you don’t need to download every app under the sun (or stars, in this case). Start with one or two and see what works for you. And don’t be afraid to experiment! Half the fun of smartphone astrophotography is playing around with different tools and techniques. Now, who’s ready to dive into camera settings?
Mastering Camera Settings for Night Sky Photography
Alright, buckle up, stargazers! We’re about to dive into the nitty-gritty of camera settings. Now, don’t freak out if this all sounds like Greek to you at first. Trust me, I was once in your shoes, staring at my phone’s camera settings like a deer in headlights. But with a little practice, you’ll be adjusting these settings like a pro in no time!
First up, let’s talk about the holy trinity of astrophotography: ISO, shutter speed, and focus. ISO is basically how sensitive your camera is to light. For night sky shots, you’ll want to crank this up pretty high – I’m talking 1600 or even 3200. Just be warned, the higher you go, the more noise you’ll get in your image. It’s like turning up the volume on a bad speaker – at some point, you’re just amplifying the static.

Next, shutter speed. This is how long your camera’s sensor is exposed to light. For star shots, you’ll want to go long – like, 15 to 30 seconds long. When I took a 30-second exposure picture, I was convinced I’d ruined my phone. But when that image popped up, showing stars I couldn’t even see with my naked eye, I was hooked!
Now, focus is tricky in the dark. Your phone’s autofocus is about as useful as a chocolate teapot when it comes to stars. So, you’ll need to focus manually. Here’s a pro tip: use the moon or a bright star to focus, then leave it set for your other shots.
Oh, and here’s something I wish someone had told me when I was starting out: shoot in RAW format if your phone allows it. It gives you way more flexibility when you’re editing later.
Lastly, don’t forget about white balance. Auto white balance can make your night sky look weird colors. I usually set mine to daylight or cloudy. It might not look right on your phone screen, but trust me, it’ll give you the most natural colors when you’re editing later.
Remember, these are just starting points. Don’t be afraid to experiment and find what works best for you and your phone. Astrophotography is all about trial and error. And hey, even if you mess up, at least you’re messing up under a beautiful starry sky!
Techniques for Capturing Different Celestial Objects
Alright, space cadets, it’s time to aim those phone cameras skyward and capture some cosmic wonders! But here’s the thing – not all celestial objects are created equal when it comes to photographing them. Each has its own quirks and challenges. Don’t worry though, I’ve banged my head against the wall figuring this stuff out so you don’t have to!

Let’s start with our nearest neighbor – the moon. You’d think this would be easy, right? It’s big, it’s bright, what could go wrong? Well, let me tell you about the time I tried to photograph a full moon and ended up with a glowing white blob that looked more like a badly poached egg than Earth’s satellite. The trick with the moon is to actually lower your ISO and shutter speed. Treat it like you’re shooting in daylight, because essentially, you are!
Now, star trails. These are those cool photos where the stars look like they’re making circles in the sky. The secret here is long exposure. And I mean long. Like, set up your phone, start the exposure, and go make a sandwich long. My first attempt at star trails lasted all of 2 minutes because I got impatient. Needless to say, the result was less than stellar (pun absolutely intended).
The Milky Way is the holy grail of smartphone astrophotography. It’s also one of the trickiest to capture. You need a dark sky, a wide-angle lens, and a whole lot of patience. I remember driving to a dark sky site for my Milky Way shot, only to realize I’d forgotten my phone mount. I ended up balancing my phone on a rock and hoping for the best. Pro tip: always double-check your gear before you leave!
Planets are another ball game entirely. They’re bright, but tiny. Your best bet is to use a telephoto lens attachment if you have one. I once tried to photograph Jupiter with just my phone’s normal camera. The result looked like a slightly blurry Christmas light. Not exactly National Geographic material.
And then there are deep-sky objects like nebulae and galaxies. I’m not gonna sugarcoat it – these are tough with just a smartphone. But not impossible! The key here is stacking multiple images. It takes some practice (and a good stacking app), but when you finally get a recognizable image of the Andromeda galaxy on your phone, it’s an incredible feeling.
Remember, the key with all of these is practice, practice, practice. And don’t get discouraged if your first attempts don’t look like the photos you see online. Those photographers probably didn’t get it right on their first try either. Keep at it, and before you know it, you’ll have a whole galaxy of amazing photos right in your pocket!
Post-Processing Your Smartphone Astrophotography
Alright, star snappers, you’ve braved the cold night air, battled mosquitoes the size of small birds, and captured some amazing shots of the night sky. But guess what? Your job isn’t done yet! It’s time to dive into the wild and wonderful world of post-processing. Don’t worry, it’s not as scary as it sounds – think of it as giving your photos a spa day!

First things first, let’s talk about basic editing. This is where you’ll adjust things like brightness, contrast, and color. Remember, subtle adjustments are your friend!
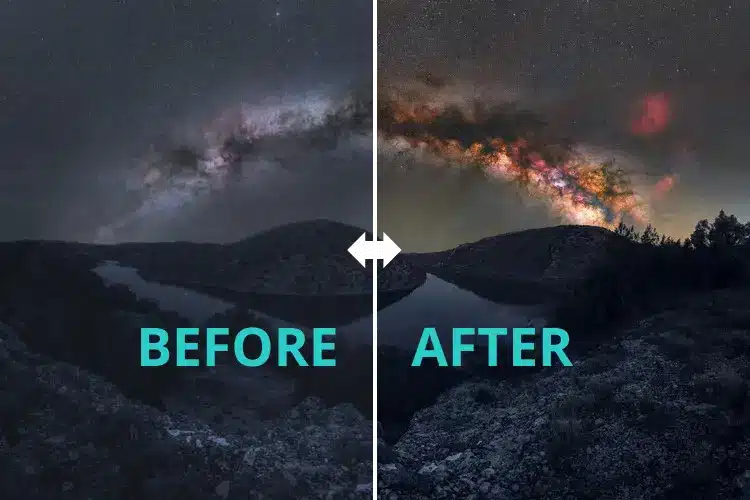
One of the coolest tricks in astrophotography is stacking. This is where you take multiple photos of the same subject and combine them to reduce noise and bring out more detail. When I tried this, I felt like a mad scientist. “It’s alive!” I shouted as my grainy Milky Way photo transformed into a river of stars. Okay, maybe I didn’t actually shout that, but I definitely thought it!
Color adjustment is another key part of post-processing. Straight out of the camera, your night sky might look a bit… well, boring. But with a few tweaks to the white balance and color saturation, you can make those stars pop! Just be careful not to go overboard – unless you want your night sky to look like a tie-dye t-shirt.
And let’s not forget about noise reduction. Night photos can be grainy, but most editing apps have tools to smooth things out. The trick is to find the balance between reducing noise and maintaining detail.
Oh, and here’s a fun project: try creating a time-lapse of the night sky! Most phones have a time-lapse mode these days. Set up your phone on a tripod, point it at the stars, and let it do its thing for a few hours. The result? A video of the stars wheeling across the sky that’ll make you feel like you’re on a spaceship.
Remember, post-processing is as much an art as it is a science. Don’t be afraid to experiment and develop your own style. And hey, if you end up with a photo that looks like it was taken on an alien planet? Just call it abstract art and roll with it!
Common Challenges in Smartphone Astrophotography and How to Overcome Them
Okay, let’s get real for a minute. Smartphone astrophotography is awesome, but it’s not always smooth sailing. There are some challenges that can make you want to throw your phone into the nearest black hole. But don’t worry! I’ve faced these challenges (and may have yelled at the sky once or twice), and I’m here to help you navigate them.

First up: light pollution. This is the bane of every astrophotographer’s existence. I remember my first attempt at shooting the Milky Way from my backyard in the city. The result? A lovely orange glow with maybe three stars peeking through. Not exactly the cosmic vista I was hoping for. The solution? Get out of the city if you can. If that’s not possible, look for apps that can help reduce light pollution in your photos. And remember, sometimes a street lamp in your foreground can actually add to the photo!
Next, let’s talk about noise. No, not the kind your neighbors make when you’re trying to stargaze. I’m talking about that grainy stuff that shows up in your photos, especially when you crank up the ISO. It’s like trying to see the stars through static on an old TV. The key here is finding the right balance between ISO and exposure time. And don’t forget about stacking – it’s a great way to reduce noise.
Now, let’s address the elephant in the room – or should I say, the tiny sensor in the phone. Smartphone cameras have come a long way, but they’re still limited compared to DSLRs. Focus on subjects that play to your phone’s strengths, like wide-field Milky Way shots or moon photography.
And oh boy, let’s not forget about battery life. There’s nothing worse than setting up the perfect shot, only to have your phone die mid-exposure. I learned this lesson the hard way on a freezing night in the middle of nowhere. Now, I always bring a portable charger. It’s like bringing a spare tank of oxygen on a space walk – you might not need it, but you’ll be glad you have it if you do!
Lastly, let’s talk about the weather. Clear skies are an astrophotographer’s best friend, but they can be frustratingly rare. I can’t count the number of times I’ve planned a shoot, only to be thwarted by clouds. The solution? Patience, my friend. And maybe a good weather app. Sometimes, the clouds can even add to your photo – a partly cloudy night can create some dramatic effects!
Remember, every astrophotographer faces these challenges, whether they’re using a smartphone or a fancy telescope. The key is to not get discouraged. Keep practicing, keep learning, and before you know it, you’ll be capturing the cosmos like a pro!
Inspiring Smartphone Astrophotography Projects to Try
Alright, space cadets, now that we’ve covered the basics, it’s time for the fun part – actually putting all this knowledge to use! I’ve got some killer project ideas that’ll take your smartphone astrophotography game to the next level. Trust me, these are gonna be more exciting than that sourdough starter you attempted during lockdown!
First up: lunar phase sequences. This is where you photograph the moon every night for a month to show how it changes. Sounds simple, right? Well, let me tell you about the time I tried this. I forgot to shoot on day 3, overslept on day 7, and by day 15, I was setting alarms labeled “MOON!” every night. But when I finally put that sequence together? Man, it was like watching a cosmic ballet. Just remember, consistency is key here. And maybe invest in a really loud alarm clock!
Next on the list: star trail composites. This is where you take a bunch of long exposure shots and stack them to create those cool circular trails. Pro tip: bring a comfy chair and maybe a good book to pass the time while your phone does its thing.
Now, let’s talk about Milky Way panoramas. This is where you take multiple shots of the Milky Way and stitch them together to create one epic, wide-field view. I attempted this on a camping trip once, and let me tell you, trying to line up shots in the dark is… interesting.
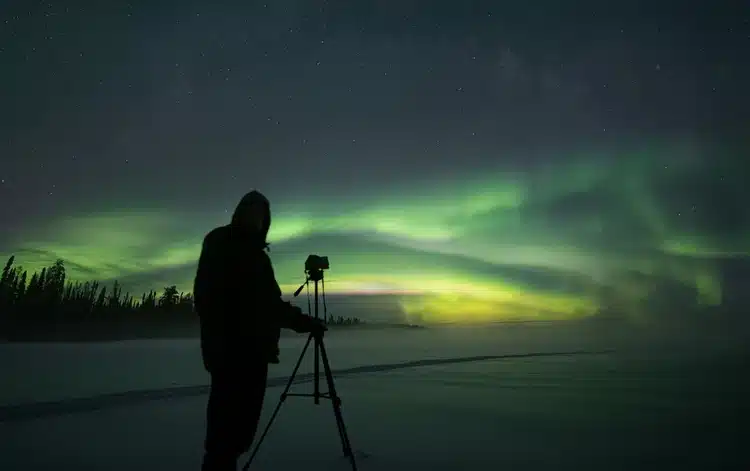
For those of you in the right latitudes, how about an aurora borealis time-lapse? Now, I’ll be honest, I haven’t tried this one myself (turns out the Northern Lights are pretty hard to see from my backyard). But I’ve seen some incredible smartphone shots from folks who have. Just remember to pack your warmest gear – nothing ruins a shoot like numb fingers!

Here’s a fun one: try capturing a conjunction event. That’s when two or more celestial objects appear close together in the night sky. I caught Jupiter and Saturn’s “Great Conjunction” back in 2020 with just my phone and a pair of binoculars. The result wasn’t exactly Hubble-quality, but it was pretty darn cool to have a record of such a rare event.
Lastly, why not try your hand at some astro-landscapes? This is where you combine the land and the sky in one shot. My first attempt at this was… well, let’s just say I ended up with a lovely photo of some trees and a black sky. Turns out, exposing for both the foreground and the stars is tricky! But when you get it right, the results are magical.
Remember, the key with all these projects is to have fun and be patient with yourself. Rome wasn’t built in a day, and neither is an astrophotography portfolio. So get out there, point your phone at the sky, and see what you can capture. Who knows? Your next shot could be one small step for you, one giant leap for smartphone night photography!
Wrapping Up
Well, folks, we’ve been on quite the cosmic journey together, haven’t we? From fumbling with camera settings to capturing the swirling arms of the Milky Way, we’ve covered a lot of ground – or should I say, a lot of sky?
Looking back, it’s pretty wild to think about how far smartphone astrophotography has come. I remember when the idea of taking decent photos of stars with a phone seemed about as likely as finding little green men on Mars. But here we are, capturing celestial wonders with the same device we use to order pizza and scroll through cat memes. Technology, am I right?
Now, I’m not gonna lie to you – this hobby can be frustrating at times. There will be nights when the clouds roll in just as you’ve got everything set up perfectly. Times when you realize you forgot to charge your phone or bring a crucial piece of equipment. Moments when you look at your photos and think, “Is that the Andromeda galaxy or just a smudge on my lens?” But trust me, those moments of frustration make the successes all the sweeter.
Remember, the most important thing is to keep experimenting and learning. Every blurry moon shot, every star trail that looks more like a squiggle, every overexposed planet – they’re all steps on your astrophotography journey. Heck, I still mess up all the time, but that’s half the fun!
And here’s the really cool thing – we’re just at the beginning. Phone cameras are getting better all the time. Who knows what we’ll be able to capture in a few years? The sky’s the limit! (Sorry, couldn’t resist the pun.)
So, what are you waiting for? Grab your phone, download some apps, and get out there under the stars. You might just surprise yourself with what you can capture. And hey, even if your photos don’t turn out exactly as planned, you’ll still have spent a night under a beautiful starry sky. In my book, that’s always a win.
Now, if you’ll excuse me, I’ve got a date with my smartphone and the cosmos. Clear skies, fellow astrophotographers!
Related Posts
5 Budget-Friendly Astrophotography Cameras
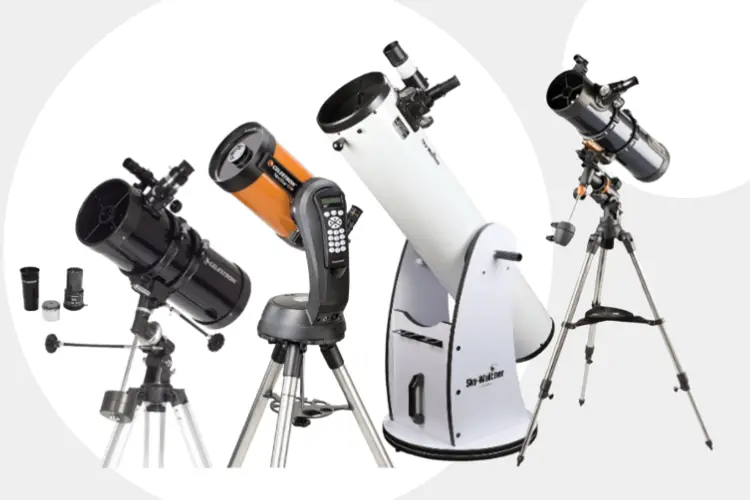
How to Choose Your First Telescope: A Beginner’s Guide
Beginner Astrophotography Guide: Capturing the Cosmos
Best Software for Astrophotography Post-Processing
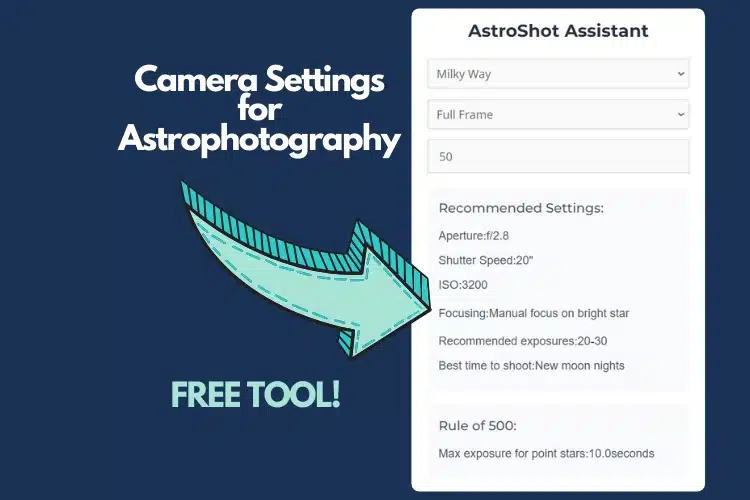
AstroShot Assistant: Easy Camera settings for astrophotography